Set Up
Dashboard Setup
An exclusive dashboard for FA must be created to access all the reports, which will be helpful to show a classic visual representation of Fixed Assets, sorting by various criteria. FA by default comes with 4 reports, which are Assets by Employee, Assets by Location, Financial Depreciation Forecast, and Tax Depreciation Forecast. The Net Book Value Report consists of Cost, Accumulated Depreciation, and Net Book Value Information and details. To create these reports and add them to the FA Reporting Dashboard, use the following steps.
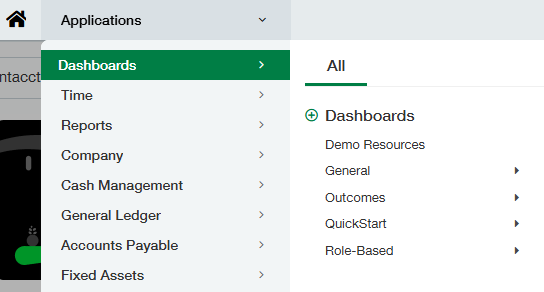
Navigate to Dashboards > Click the plus sign Next to Dashboard
Title: “Fixed Assets Reporting”
Columns: “1”
Default field: Checked
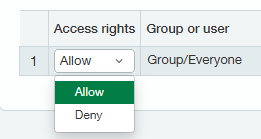
In the Permissions tab and change the Access Rights to “Allow” for the group/everyone and click Save.
Now, navigate to Dashboards and click on View Components for Fixed Assets Reporting Dashboard.
Click the + sign towards the top right of the page.
Component Type: “Smart Links”
Component title and Link Name: “Fixed Assets Roll Forward Report”
URL:
https://prod11.sageintacctmpp.com/FAReportingWebApp/login/{!USERPROFILE.SESSIONID!}
Click Save
Download the package FAR_CustomReports from the FA Setup files folder. This file contains four custom reports: Assets by Location, Assets by Employee, Financial Depreciation Forecast, and Tax Depreciation Forecast reports.
A valid and current date range needs to be provided in the Tax Depreciation Forecast Report. To do this, edit the package by right-clicking on the FAR_CustomReports and clicking Edit/Edit with Notepad++. Scroll down to the bottom of the document in the Tax Depreciation Forecast Report (Click Ctrl+f and find “Tax Depreciation”). Navigate to the <filter> and </filter> tags and there are two date ranges which are mentioned. Edit and set the desired date range. Be sure to use the date format mm/dd/yyyy. The first date should be the first day of the current fiscal year and the second date should be the last day of the fiscal year. Save the file. The date format must match the user importing the package’s date format. To check the user-enabled date format, navigate to Company > My Preferences > Date Format.
Next, import the package again (Platform Services > Packages, click on New Package). Once the file is imported, you can change the date format from Company > My Preferences to look at the reports in the desired date format. If any of the packages in the Intacct Instance need to be modified after they have been imported, you can do so by editing the local copy of the package on your computer and then import it again. However, doing so will overwrite the existing version of the package.
Navigate to Reports > Report Center and search for Assets By Employee, then click on it.
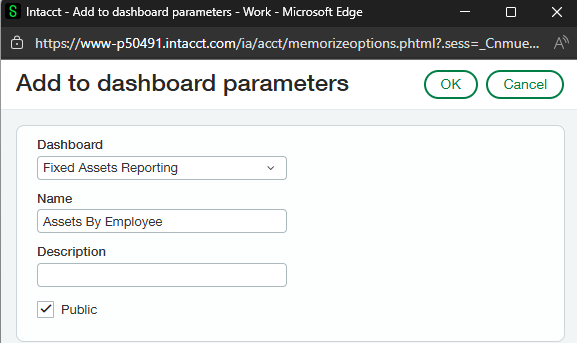
Click on the Add to Dashboard button
Set the Component Name to “Assets By Employee,” select the Dashboard “Fixed Assets Reporting,” check the checkbox for “Public,” and click “OK.” Repeat steps 15-17 to add the remaining reports, “Assets By Location,” “Financial Depreciation Forecast,” and “Tax Depreciation Forecast” to the Fixed Assets Reporting Dashboard.
Navigate to Dashboards and click on View Components for Fixed Assets Reporting Dashboard.
Click on the + sign in the top right corner of the page
Component Type: “Record”
Component: “Asset”
User View: “All Live Assets by Category (with image)”
Component title: “Assets”
Click Save
Arrange the components such that Fixed Assets Reporting (link) is first, followed by Assets, Assets By Location, Assets By Employee, Financial Depreciation Forecast, and then Tax Depreciation Forecast report at the very end.