User Guide
How to populate Data Import Templates
This section provides general guidance and best practice recommendations for filling out the Books & Asset Classes tab of the Fixed Asset Configuration Sheet and Fixed Asset Import Template for Assets.
Import Financial Books
Open the “Fixed Assets Book Upload Template” (FABUT) and “Fixed Assets Config Sheet Template” (FACST) from the Templates folder. There will be two Excel sheets open, and the FA Implementer will work in parallel with both sheets. The process should be initiated by uploading the Financial Books. Intacct works only with the CSV file format for importing any data.
Copy all the contents of the “1st Mth” column from the FACST template into the column called “Convention” of the FABUT template. Repeat the same process by copying the “UL (Ms)” column from the FACST template to the “Asset Life” column in the FABUT template.
To populate the Depreciation Method column of the FABUT template, the Integration IDs need to be known since the system will accept only the Integration IDs for the relevant method. To get a list of all the Integration IDs for the depreciation methods, navigate to Fixed Assets > Depreciation Methods
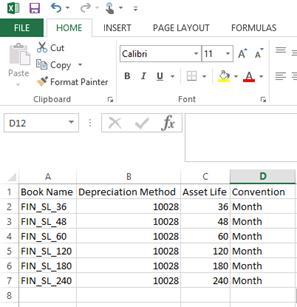
For the “Book Name” column name in the FABUT Template, the FA Implementer can provide any descriptive and easily identified name. Some examples of Book Names can be “FB_SL_36,” or “FB_SL_48,” etc. The final Excel sheet should look something like the screenshot below. Be sure to save it using an appropriate name and in the CSV format. The original FABUT template file should be retained unmodified for reuse as a template in the future.
Please remove any duplicate lines in the Excel sheet to ensure that no Financial Books are repeated. To remove duplicates, navigate to the Data Tab in Excel and click on the Remove Duplicates button. (The exact instructions might vary per the different versions of Excel).
To Import, navigate to Fixed Assets > Book Details > Import. Browse to the FABUT file and select the Import Mode as “Online” if there are fewer than 100 records else select “Offline.” If you select the “Offline” Import Mode, an email will be sent out to the specified address notifying the status of the import process.
Map the fields shown on the right from Intacct to the CSV file. A success or an error message appears after the import is complete. After you successfully map the fields, you can click on the “Save Map” button to use that map for importing books in the future.
Import Tax Books
The procedure to upload the Tax Books will be the same as uploading Financial Books except for the differences described below.
Open the FACST template file. Open a new copy of the FABUT template so that Financial and Tax Books upload files are kept separate. Populate the “Asset Life,” “Convention,” and “Depreciation Method” columns for desired Tax Books by following the same steps used to populate the columns in the Financial Books upload CSV file by referring to the sections highlighted in light pink. Assign a descriptive Book Name for each Tax Book and save the excel sheet with an appropriate name using the CSV file type.
Navigate to Fixed Assets > Book Details > Import, complete the field mappings step as prompted, and click on Import to import the Tax Books.
Import Asset Classes
To begin importing Asset Classes, open the Fixed Asset Config Sheet template (FACST) and Asset Class Template (ACT) file. Copy all the contents from FACST to the ACT template using the following mapping.
Asset Class > Asset Class
Code > Asset Code
Type > Asset Type
Cost > Asset GL Account
A/D > Accumulated Depreciation GL Account
Expense > Depreciation Expense GL Account
Add the Financial and Tax Book Name, respectively, to all the Asset Classes in columns G and H. The ACT template should now look like the screenshot shown on the right.
Import the template by navigating to Fixed Assets > Asset Classes > Import. Enter appropriate field mappings when prompted and click on Import.
Import Assets
The Assets to be imported are provided in a separate Excel sheet by the client. Save that file as a CSV file type.
Navigate to Fixed Assets > Assets > Import. Browse the file and select the Import Mode as “Online” or “Offline” depending on the number of Assets that are to be imported. Intacct recommends selecting the “Offline” Import mode to avoid latency issues when large numbers of assets are being imported.
Make sure the “Create Dep on Import Flag” field is set to checked as its Constant Value and the Status field is set to “In Service” if the FA system is expected to create depreciation schedules.
Once all the Assets have been uploaded, an email will be sent out to the specified email address (if “Offline” import mode was selected) informing of the success/error status of the import operation.
Navigate to Fixed Assets > Depreciation Schedules to check the progress of your Asset upload.
To correct any validation errors directly from the list, navigate to Fixed Assets > Validation Messages. Additionally, an email notification providing a list of Validation errors will be sent out to the email address associated with the active User ID.
In case of any errors due to which the Assets have failed to upload, the Implementer may fix those errors and revalidate the Asset. To revalidate the Asset, click on the Revalidate Asset button present on the Asset page. Please consult the Fixed Asset User Guide for more details on Asset Validation.
At this point, the setup of the Fixed Assets application, as well as required data uploads, is complete, and you are ready to start using the Fixed Assets Application.