User Guide
Change Asset Attributes
A transfer of an Asset may occur due to a change in ownership, movement of funds, or changes in the useful life of an Asset. Assets can only be transferred one at a time. Mass transfer of Assets is not currently supported by the application. Useful life can be decreased, left the same, or increased only if the posted depreciation period for the source asset is less than the useful life to be changed. The Fiscal Periods of the source asset must also be the same as the transferred Asset. All financial depreciation schedules of the Asset being transferred must be posted up to the current period to proceed with changing the Asset attributes.
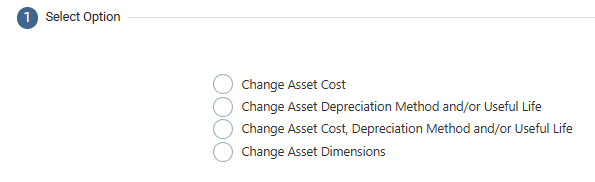
There are four options to transfer an Asset depending upon the business requirement. They are present after you click the ‘Change Asset Attributes’ button on the upper right corner inside the View Asset page.
Change Asset Cost
Change Asset Depreciation Method and/or Useful Life
Change Asset Cost, Depreciation Method, and/or Useful Life
Change Asset Dimensions
Steps to Change Asset Cost:
Select the Change Asset Cost option and click Next
Provide the Asset Details (Any red field is a required field and must be entered)
Dimensions: The values for standard and user-defined dimensions can be overridden by assigning a new value before proceeding to the next step. If an allocation rule is assigned, the option to update the allocation rule will be provided here, and the dimensions will be grayed out.
Click Validate
Confirm current and new values and then click on Next to proceed with changing the Asset Cost.
Steps to Change Depreciation Method and/or Useful Life:
Select the Change Depreciation Method and/or Useful Life option and click Next
Provide the Asset Details (Any red field is a required field and must be entered)
Dimensions: The values for standard and user-defined dimensions can be overridden by assigning a new value before proceeding to the next step. If an allocation rule is assigned, the option to update the allocation rule will be provided here, and the dimensions will be grayed out.
Select an Action
a. Re-generate remaining depreciation schedules: With the help of this method, the system will not impact any journal entries posted to the GL. The system will continue depreciating based on the new Asset Class and/or Books assigned to the asset at the time of the transfer.
b. Re-generate all depreciation schedules: With the help of this method, the system will review the historical journal entries in the GL and accordingly create adjusting entries based on the updated depreciation parameters for the Asset. Journal entries will be created by the application to adjust the asset, accumulated depreciation, and posted depreciation from the old asset. The depreciation amount posted to the current period of the new asset will be computed according to the new asset’s per-period depreciation amount. Finally, the NBV of the new asset at the end of the current period is adjusted to account for differences in the old and new assets’ accumulated depreciation.
Select a Financial Book or create a new one if necessary.
Select an Asset Class or create a new one if necessary.
Confirm current and new values and then click on Next to proceed with changing the Asset’s attributes.
Steps to Change Asset Cost, Depreciation Method, and/or Useful Life:
Select the Change Asset Cost, Depreciation Method, and/or Useful Life option and click Next
Follow steps 2 - 6 from the previous section
Confirm current and new values and then click on Next to proceed with changing the Asset’s attributes.
Steps to Change Asset Dimensions:
Select the Change Asset Dimensions option and click Next.
Enable the checkbox, Create GL Batch if you’d like to record this change in the GL and provide a Transfer Date.
The application will transfer the net book value of the asset to the new set of dimensions if the user opts to create a GL batch.
Select the new dimensions and click Next. If an allocation rule is assigned, the option to update the allocation rule will be provided here instead of the dimensions.
Confirm the values and submit the asset for transferring dimensions.
Post-Check Process: Once you have changed an asset’s attributes, there are several ways to confirm that the changes were completed within the asset itself. View the asset(s) and check that the respective fields and information are correct according to your changes.
Source Asset (after attribute change)
Status updated to “Transferred”
Status reason reflects the specific change (e.g., cost, depreciation method, useful life)
Status Change Tab records date of transfer and transfer type
GL Batch Transfer: journal entry created for asset cost and depreciation adjustments (if applicable)
Remaining financial depreciation schedules changed from “Created” to “Cancelled”; posted schedules remain unaffected
Tax depreciation schedules removed from the source asset and attached to the changed asset; a new tax book is created if the method or useful life changed
Changed Asset (after attribute change)
Status set to “In Service”; status reason blank
New financial depreciation schedules generated and recalculated based on updated attributes
Tax depreciation schedules attached to changed asset; new tax book created if method or useful life changed
Accumulated Depreciation Before and Last Posting Date Before Import updated from source asset
Net Book Value, depreciation amounts, and other relevant fields recalculated for the changed asset