Lease Groups
Creating Lease Groups
Next, we will create a lease group so that you can attach dimensions to your lease. Please keep in mind that only one group can be attached to a lease at a time, but multiple leases can be attached to the same lease group.
There are many ways to categorize Lease Groups, but it is most common to create Lease Groups based on different Locations.
If you wish to create a lease group with allocations, please go to our Allocations page.
Additionally, if you would like more information on separating dimensions by GL Account type, please go to our Different Dimensions per GL Account Type page.
To create a lease group:
Go to Lease Accounting > Lease Groups, then click the + icon beside Lease Groups.
Note: Lease Groups can also be created from within a new Lease by going to Lease Accounting > + Lease, then clicking on the + icon within the Lease Group field.
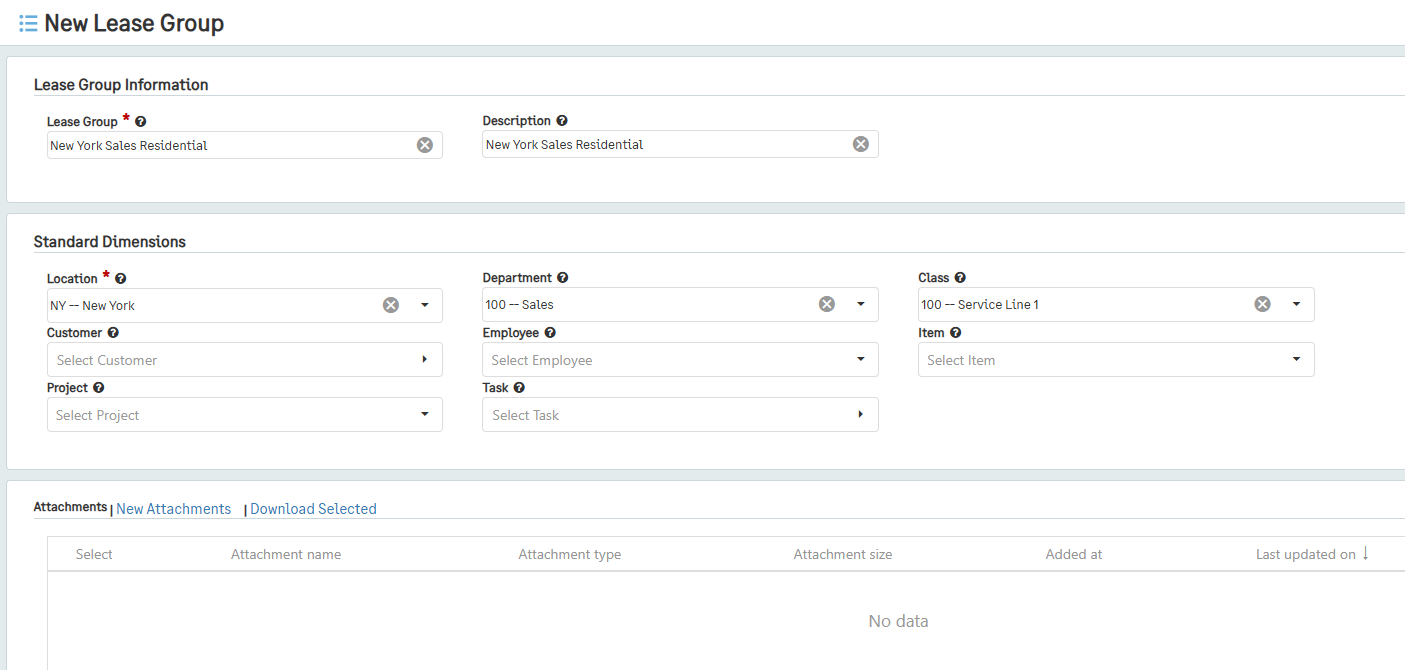
Enter a name for the lease group in the Lease Group field.
In the Description field, enter a short description of why the lease group is being made.
Next, select the Location for this lease group.
If applicable, enter the Department, Class, Customer, Employee, Item, and Project to which this lease group will be attached.
Lastly, add any Attachments that would be helpful to this lease group.
Click Save.