Setup Sage Intacct
Setting Up the Role and Permissions
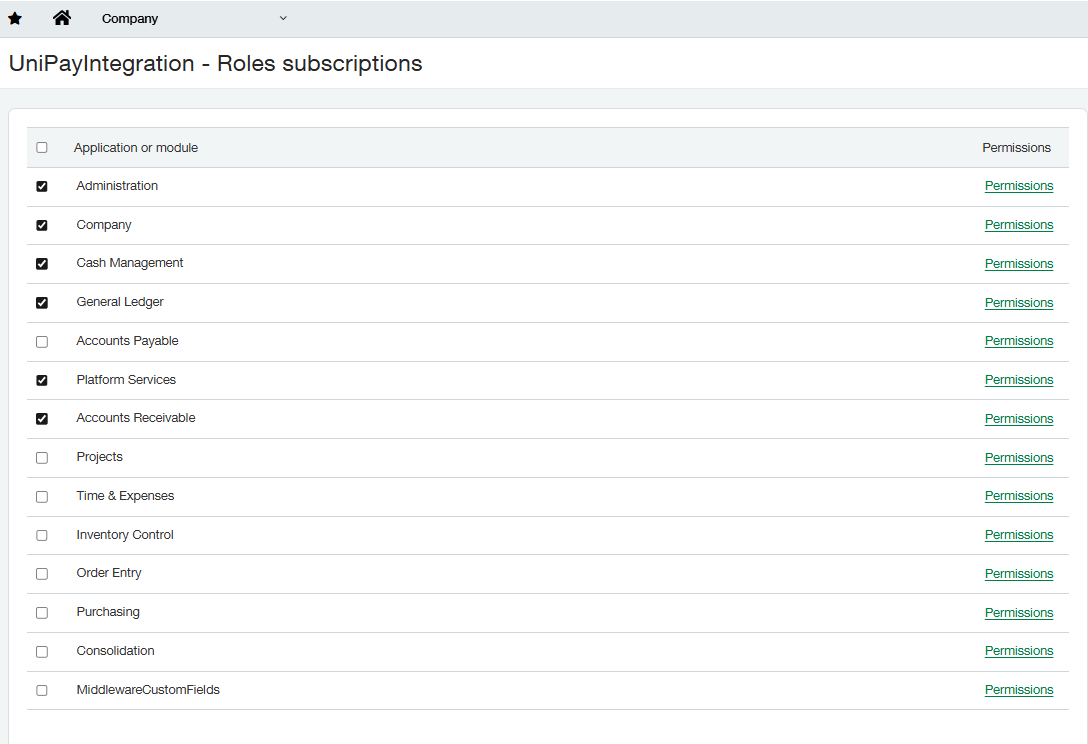
You will now need to create a new role by going to Company>Admin>Roles and select Add. We will name this role Unipay Application, and you may provide any description. Once done, select Save. To edit and assign Role permissions, select "Edit" on the newly created role and then click "View Subscriptions." A list of Intacct applications and modules will be available.
(Important - Any user that creates transactions should have the Online Payments Application permissions so that the integration properly automatically creates the Online Payments Customer and Invoice object records when a user creates customers or transaction)
Below are the following permissions required for Unipay Sage Intacct:
Online Payments: Select All
Administration: Select Read Only
Company: Select Read Only
Cash Management: Select Read only with the exception of Bank Interest and Charges: Select List, View, Add, Edit
General Ledgers: Select All, with the exception of
Journal Entries: Select List, View, Add, and Edit
Platform Services: Select All
Accounts Receivable: (Select Read Only with the additional Settings below)
Create payment: Select All
Invoices: Select All
Manage Payment: Select All
Adjustments: Select All
Quick Deposits: Select All
Receive Advances: Select All
Customers: Select List, View, Add, Edit
Order Entry (if utilizing Order Entry Module)
Order Entry Transaction: List and View
Payments: Add
Once all permissions have been updated, select Save. The last step here is to provide the role to the Webservices user.
Navigate to Company→Webservices User and select edit on xmlgw_Unipay user.
On the Roles Tab, give the user the created role Unipay Application.
Now select Save. You have now completed adding the Webservices User and permissions to the Intacct company.