Setup Sage Intacct
How to Access the Import Center
When a new customer or invoice is created, a related Online Customer Payment Prefs and Online Payment Invoices Synchronization gets created automatically.
There are instances where a user might need to manually create these records or update them in bulk. For this, the Unipay application provides an Import Center where users can download a template and choose to create new or update existing records. To access the Import Center, you will navigate to Applications>Online Payments>Import Center. The following options are visible on the Import Center:
Types - these specify the type of record that will be created or updated via the import. The two types are the Only Payments Customer Prefs record or the Only Payments Invoice Synchronization record.
New - This is the option that allows the user the ability to create a new record manually here from the UI.
File - This column is the option that allows a user the ability to import/update. When a user clicks "Import/Update," a new window appears with the options to "Upload a File" or "Download the Template." Additionally, a user can choose to make the import run either online or offline. By default, imports of over 1000 records are run offline, and there is a limit of 10k records imported at once. Note: Online Payment Invoice Synchronization records can only be created.
Entries - This column takes the user to the list off all records for the selected object.
Template - This option downloads the template for the import.
Using the Import Center
When you are ready to import to create or update records, you would:
Navigate to the import center and click on Import/Update under the file column.
Figure 2 shows the new screen that will be populated. You have the option to Upload File and Download the Template. Note, when importing, the template used needs to be exact and is cap sensetive. Additionally, a user can choose to import Online or Offline. If the import is greater than 990 records, the system will upload in Offline. Lastly, the import is limited to 10k records per import.
To upload select, Upload File. Choose the file you wish to upload. Once selected, the system will review the file and present the data in a new table. The table will inform the user of any issues such as duplicate lines or unused fields.
A user now has the option to select either Validate Data or Process File, or change the import type to Online or Offline. This can be seen in Figure 3.
When a user is ready to process the file, they will select Process File. If it was run online, a progress bar will appear with the progress of the import. At the end, the user will be provided with the results and an email. If the process is run offline, the user will receive an email once the offline job has run.
If a user wishes to see current imports that are running or past imports, they can navigate to Online Payments>Import Center Process and Error log.
When to utilize the Import Center
Below is a list of potential scenarios where the Import Center would be utilized.
The import tool can be used to create new Online Payment Customer Prefs.
There is more than one entity being setup for the integration - Unipay supports a relationship where each entity or top level has a connection to an account with the payment provider. This connection is made via a payment account in the middleware of the integration. By default, the Customer Payment Prefs object is generated at the level (Top or Entity) in which the customer is created. If the customer is created at the top level, but the integration is linked at a given entity, the Online Customer Prefs record for that customer needs to be assigned to that entity. If that customer should be linked to payment accounts for more than one entity, an Online Customer Prefs Record needs to be created for each entity (example, a record for E100 and another for E200). This allows for transactions in different entities to go to different payment providers, or to keep customers from syncing to different payment providers based on the entity. Using the import tool, a user can create new Online Payment Customer Prefs Records for customers in mass.
There needs to be a Customer Online Prefs object for existing customers - A user can use the import tool to create Online Customer Prefs records in mass for existing customers.
The Import tool can be used to mass update existing Online Payment Customer Prefs records.
Need to mass update the Payment Provider Customer ID, Mandate ID, or Payment Method ID - A user can utilize the import tool to mass update the Online Payment Customer Prefs object for customers who may already exist in the payment providers account or to update the integration with the correct information.
Mass update the autopay flag or any of the other object settings - A user can mass update the Online Payments Customer Prefs objects for customers to change any of the settings such as enabled or disable autopay, enable consolidated payments, etc.
The Import tool can be used to create Online Payment Invoices Synchronization
Need to create Online Payment Invoices Synchronization records for existing invoices - When the Unipay package is installed, there may be existing invoices a user would like to sync using the integration. These invoices will not have the Online Payment Invoices Synchronization records. A user can use the Import/Update option to create them in mass for the invoices they would like to sync over.
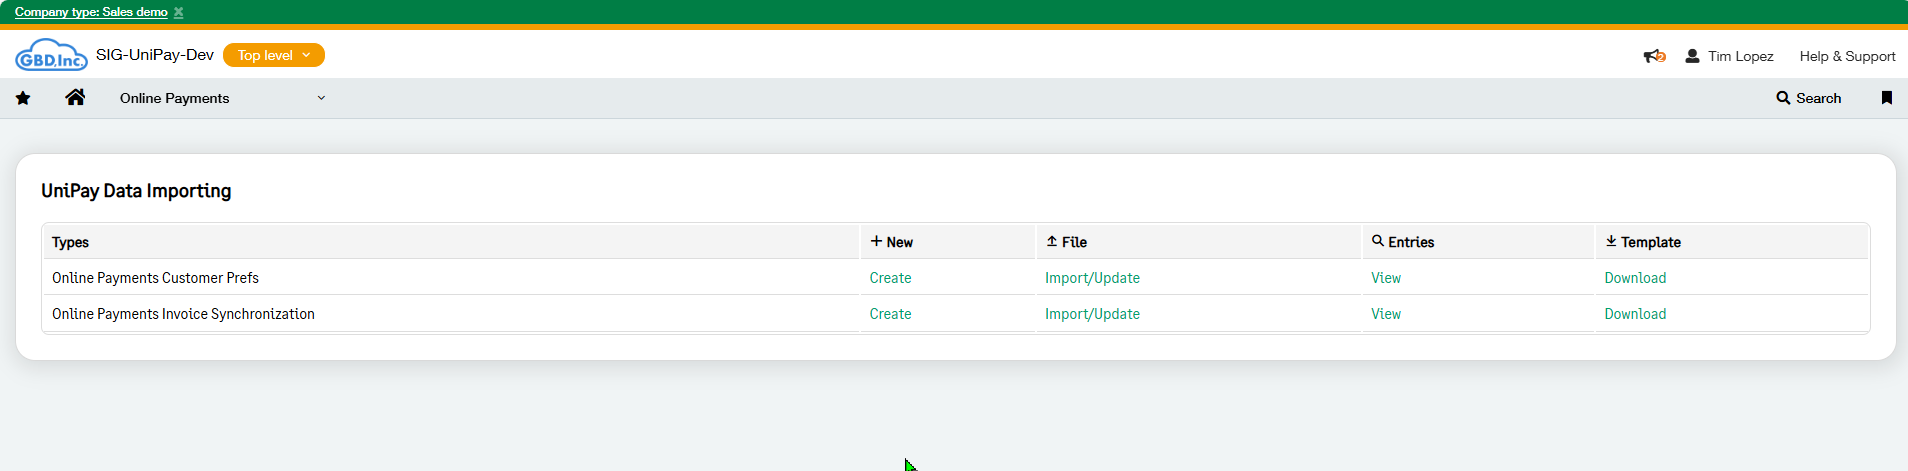
Figure 1

Figure 2
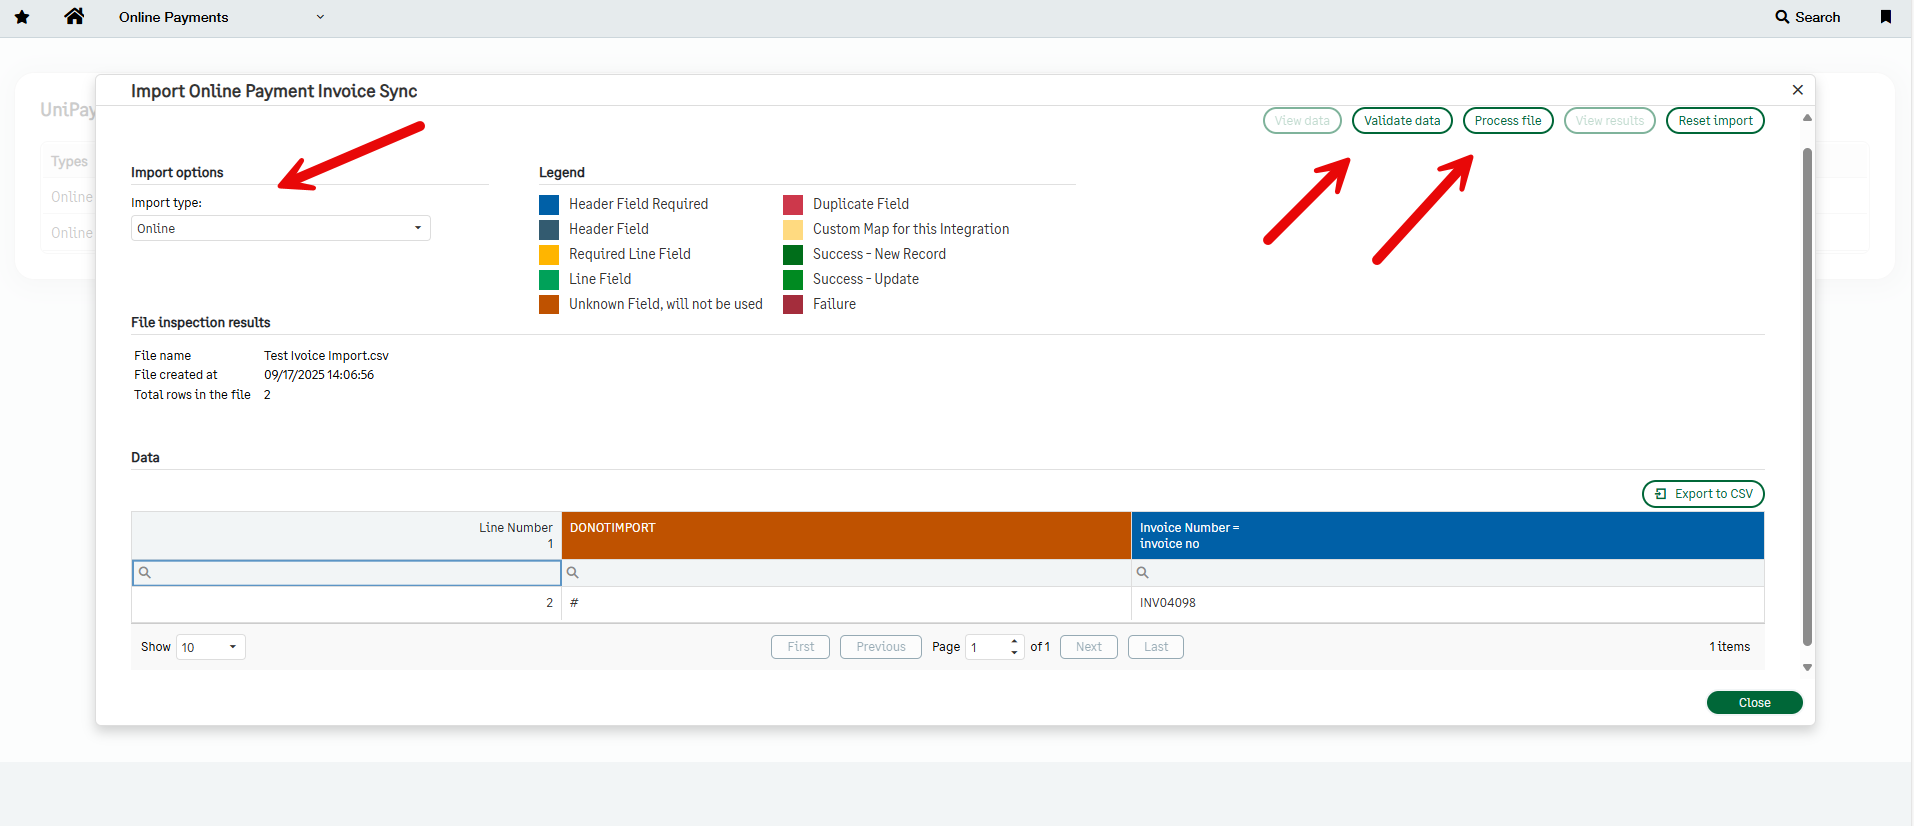
Figure 3